
 English
 русский
 Español
 عربى
عربى bahasa Indonesia
Bring Walls, Furniture, and Ceilings to Life with Hot Stamping Foil
For decades, the world of interior design has been dominated by paint, wallpaper, wood stains, and tile. While these are fantastic and versatile mediums, a new—or rather, newly adapted—player is entering the home decor arena, offering a touch of unparalleled magic: hot stamping foil.
If you’re imagining the subtle, metallic sheen on a luxury business card or the elegant title on a hardcover book, you’re on the right track. But what if you could scale that same exquisite, tactile detail to the size of a wall, a cabinet door, or a ceiling medallion? This isn’t a far-fetched design fantasy; it’s an accessible and incredibly rewarding technique waiting for the adventurous DIYer and the professional designer alike.
Hot stamping foil, often just called “foil stamping,” is the process of using heat and pressure to transfer a thin, pigmented film from a carrier roll onto a surface. It’s how that sleek gold logo gets on your notebook. And with a bit of knowledge and the right tools, you can use it to create breathtaking, custom details in your living space that are simply impossible to achieve with any other method.
What Exactly is Hot Stamping Foil?
Before we dive into application, it’s helpful to understand the material itself. Hot stamping foil is a multi-layered film. It’s not a paint or a leaf you apply with adhesive. Its structure typically consists of:
The Carrier Layer: This is a thin, stable plastic film (usually polyester) that holds all the other layers. It’s what the foil comes on when you buy it on a roll.
The Release Layer: This coating is designed to melt and let go of the carrier layer when heat is applied.
The Lacquer Layer (or Color Layer): This is the visible part! It contains the pigments or metallic particles that give the foil its color and effect. This can be metallic (gold, silver, rose gold), pigment (solid colors like red, blue, black), holographic, or even clear (for a high-gloss protective effect).
The Adhesive Layer: The bottom layer that is activated by heat and bonds the lacquer/color layer permanently to your target surface.
The magic happens when a heated metal die (a stamp, essentially) presses the foil against the surface. The heat activates the release and adhesive layers, causing the color layer to detach from the plastic carrier and bond to the substrate. When you lift the die away, the carrier film is pulled back, leaving behind a perfectly transferred, crisp, and shiny design.
Why Use Foil Stamping in Interiors? The Unbeatable Benefits
You might be wondering why you’d go to this effort instead of just using metallic paint or a gold leafing pen. The reasons are compelling:
Unmatched Durability: Once properly applied, the foil is not a surface coating; it’s a transfer that becomes part of the material. It’s highly resistant to scratching, fading, and wear. It won’t chip like paint or peel like cheap vinyl decals.
A Professional, Luxurious Finish: The result is sleek, continuous, and has a depth and shine that paint cannot replicate. It feels expensive because it looks expensive. It’s the difference between a printed gold effect and real, solid metallic foil.
Precision and Crispness: Whether you’re creating intricate patterns, sharp geometric lines, or fine typography, the level of detail you can achieve is exceptional. The edges are clean and defined.
A World of Effects: The variety of foils available is staggering. Beyond standard gold and silver, you can find foils that mimic marble, woodgrain, brushed metals, vibrant neon colors, and iridescent patterns that shift in the light. This opens up a universe of creative possibilities.
Tactile Quality: Foil stamping can be done as a “blind” deboss (stamping without foil to create an indent) or with foil to create a raised, textured effect that you can feel with your fingers. This adds a rich, sensory layer to your design.
From Roll to Room: How to Apply Hot Stamping Foil on Large Scales
This is the practical heart of the guide. Applying foil to a book cover is one thing; applying it to a wall is another. Here’s how to approach it.
The Tools You’ll Need
The Foil: Sold on rolls in various widths. For large projects, wider rolls (5", 10", even 20") will save you time and ensure seamless patterns.
The Heat Source: This is the biggest decision.
Professional Hot Stamping Machine: For serious, frequent use, a manual or pneumatic press is the gold standard. They provide even pressure and temperature control. For walls, a large-format press would be ideal but is a significant investment.
Foiling Iron / Mini Heat Press: A more accessible option. Crafting versions like the Heidi Swapp Minc or the We R Memory Keepers Foil Press are designed for paper but can be used on small, flat wood pieces.
Household Iron: Yes, a standard clothes iron can work! It’s the most budget-friendly entry point. Use it on its highest dry setting (no steam!). The challenge is that it has a large, curved surface, making precise work difficult.
Heat Transfer Pen / Tool: These are like soldering irons with specialized tips. They are perfect for tracing designs and doing extremely detailed, freehand work. They offer the most control for intricate patterns.
3D Printer or CNC Router: The ultimate tool for automation. You can create a custom stamping die with a 3D printer (using a heat-resistant filament) or use a CNC router to carve one from magnesium or brass. You can then attach this die to a heat source and use it to stamp a repeating pattern with perfect consistency.
The Die/Stamp: This is what creates your design.
Pre-made Metal Dies: Great for repeating a specific shape (e.g., a floral motif, a geometric pattern).
Custom Dies: For a completely unique design, you can have a metal die manufactured.
Laser-Cut MDF or Acrylic: For larger, simpler shapes, laser-cut wood or acrylic can work as a die, though it may not withstand heat as long as metal.
3D-Printed Dies: As mentioned, a cheap and effective way to create a custom die for smaller projects.
The Surface (Substrate): Preparation is key! The surface must be:
Smooth: Any texture will prevent the foil from adhering evenly. Sand wood to a very smooth finish. Use a high-quality, smooth primer and paint on walls.
Non-Porous: The adhesive needs a sealed surface to bond to. Raw wood, raw drywall, or porous plaster will not work. You must seal it first with an appropriate primer, paint, or varnish.
Heat-Resistant: Obviously, the surface must be able to withstand the heat of your tool without burning, melting, or warping. Wood, MDF, well-painted drywall, glass, and some plastics are ideal.
The Step-by-Step Process
Design and Plan: This is the most important step. Decide on your pattern. Will it be a single, large statement piece? A repeating pattern? A border? Measure your space and plan the layout. Use painter’s tape to mock up lines on the wall if needed.
Prepare the Surface: Sand, fill, prime, and paint your surface. Ensure it is impeccably smooth, clean, and completely dry. Wipe it down with a tack cloth to remove any dust.
Prepare Your Die and Tool: If using a custom die, secure it to your heat source (some irons have flat plates you can attach dies to). Heat your tool to the recommended temperature for your foil (often tested through trial and error). Start low and increase to avoid scorching.
Position the Foil: Unroll a section of foil and place it over the area you want to stamp, with the colored side facing up. You can secure it lightly with painter’s tape to prevent it from shifting.
Apply Heat and Pressure: Firmly press your heated die or tool onto the foil. Hold it steady for a consistent count (e.g., 5-10 seconds). The key is even pressure and consistent heat. Don’t wiggle the tool.
The Reveal: Carefully lift your tool and, while the foil is still warm, peel back the carrier sheet at a sharp angle. You should see your design perfectly transferred. If it’s patchy, you may need more heat, more pressure, or more time.
Repeat: Continue this process, carefully aligning your die for a repeating pattern, until your project is complete.
Inspiration: Where to Apply Foil in Your Home
Now for the fun part—the “where.” The applications are limited only by your imagination.
On Walls:
Accent Walls: Create a massive, breathtaking geometric pattern or a freehand organic design behind your bed or sofa.
Borders and Chair Rails: Apply a continuous line of foil at chair rail height or just below the ceiling for a modern twist on classic detailing.
Architectural Highlights: Emphasize the lines of arches, niches, or built-in shelving with a thin line of metallic foil.
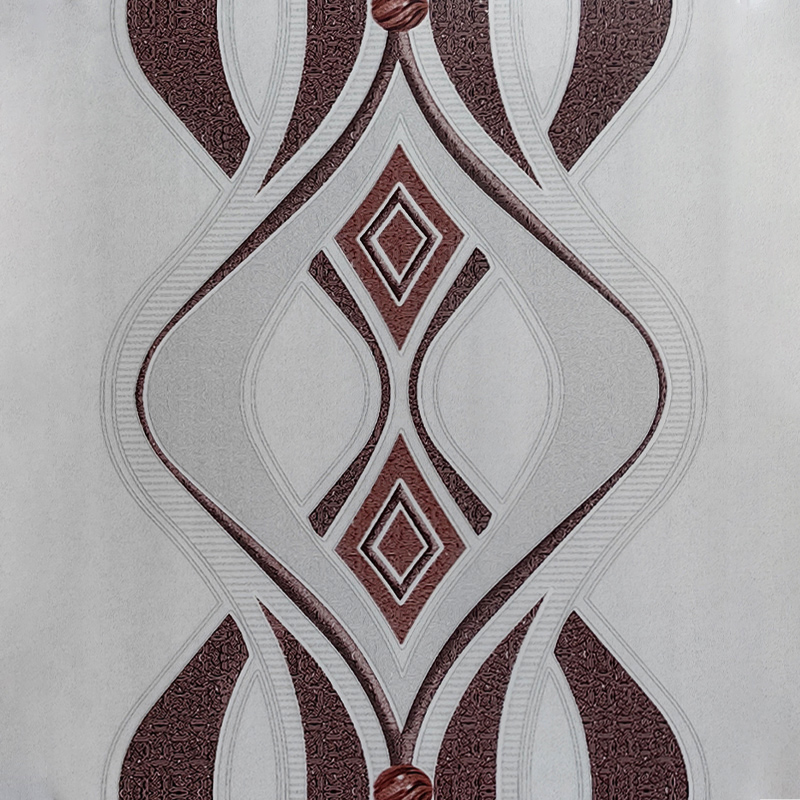
Stenciled Effects: Use a large, laser-cut stencil as your die to stamp an all-over pattern like damask, art deco sunbursts, or Moroccan tiles.
On Furniture:
Cabinet Fronts: Add a thin line of gold foil to the edges of cabinet doors for a sleek, contemporary look in the kitchen or bathroom.
Tabletops: Inlay a complex design into a resin-coated table or simply stamp a pattern directly onto a sealed wood surface for a stunning centerpiece.
Drawer Fronts and Headboards: Personalize pieces with monograms, quotes, or simple graphic elements.
On Ceilings:
Medallions: Transform a plain ceiling medallion around a light fixture with intricate gold or silver details.
Coffered Ceilings: Highlight the recessed panels or the beams of a coffered ceiling with foil to create incredible depth and drama.
Unexpected Detail: Add a secret, beautiful pattern that is only fully visible from certain angles or when lying in bed—a truly personal and surprising touch.
A Word of Caution and Encouragement
Hot stamping foil is not the fastest decorating technique. It requires patience, practice, and a willingness to experiment. Always, always test your process on a scrap piece of your actual project material first. This test piece will tell you everything you need to know about the right temperature, pressure, and timing.
Start small. Don’t begin with a 10-foot wall. Try a picture frame, a small wooden box, or a piece of art you want to hang. Build your skills and confidence.
Bringing hot stamping foil into your home is about embracing a craft. It’s about rejecting the mass-produced and investing your space with a level of personalization and artistry that is truly unique. It’s the process of turning your walls, your furniture, and your ceilings into a canvas not for paint, but for light, texture, and metallic brilliance. So, get a roll of foil, dust off that iron, and start creating. The results will be nothing short of alchemical.
Recommended products


-
 Building 10-2, No.1 Weiye Road, Shuangfeng Village, Yuan Hua Town, Haining City, Jiaxing City, Zhejiang Province, China
-
 +86-15988394213
-
 +86-0573-87888039
-
 [email protected]
Copyright @ Zhejiang Mingli New Materials Co., Ltd. All Rights Reserved.
 Decorative Color Film Factory